Have you heard of bone broth?
Maybe you’ve heard it mentioned but aren’t quite sure what it is why it is so highly praised by many.
Bone broth is simply a liquid obtained from boiling bones from chicken, turkey, pork or beef in water.
The biggest difference between bone broth and regular stock is that bone broth is cooked a lot longer.
The end result is a tasty liquid that’s delicious on its own, but also makes a wonderful and nutritious base for soups and stews.
Speaking of nutrition, it’s one of the main reasons people make and consume bone broth regularly.
Of course, it’s also very tasty, but more on that in a minute.
When you boil bones for a long period of time, you leach all sorts of nutrients, minerals and other things that are good for you like glucosamine and collagen.
Remember grandma making a big pot of chicken soup anytime someone would get sick?
The same principal is at work here. Think of bone broth as a more concentrated version of Grandma’s healing soup.
The broth may even help you sleep better at night.

The Benefits Of Making Your Bone Broth From Scratch
There are a lot of good reasons to make this amazing liquid.
If you haven’t tried making your own yet, grab some leftover chicken bones and a pot and get to work.
Your taste buds, wallet and your health will thank you.
1. It’s Tasty
Let’s start with the obvious homemade broth, stock or bone broth tastes really good.
If you haven’t tried making any of these, do yourself a favor and get in the kitchen now.
Bone broth, in particular, has a deep rich flavor that you just won’t get out of a cartoon of chicken stock.
Drink the broth on its own, or use it as the base for soups, stews, and sauces.
You can use bone broth in any recipe that calls for broth or stock. Or try simmering your rice or vegetables in the broth for added flavor and nutrition.
2. It’s Frugal
Bone broth is made from the bones you’d toss in the trash otherwise and water. It doesn’t get a lot more frugal than that.
For no more than the cost of a little power to boil the bones, you have something that’s just as tasty as or better than high-end stock you buy at the store.
If you’re buying quality chicken, turkey or beef, you can make the most of every dollar you spend by utilizing every little bit including the bones.
Then take it even further by making soups and stews with the broth. It’s a great way to make even little bits of meat and veggies go a long way.
3. It’s Good For You
Let’s not forget about the health benefits of bone broth. There’s a reason grandma would put on a pot of homemade chicken soup when someone got sick.
Bone broth is full of minerals including magnesium and calcium.
The fat content in the broth helps our bodies absorb the various minerals.
It’s also full of collagen and gelatin which are good for your skin, hair, and joints.
Add to that the immunity-boosting properties of a good cup of broth and it’s no wonder this has been praised for centuries.
Grab that chicken carcass leftover from last night’s dinner from the fridge, get out your large stockpot and get cooking.
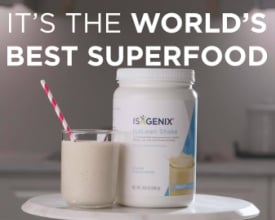
Rather just buy it? You can find bone broth supplements on Amazon or Isagenix.com

Basic Way To Make Your First Batch Of Bone Broth
The easiest way to make your first batch of bone broth is to start with a cooked chicken.
- Roast it yourself or head to your local grocery store and pick up a rotisserie chicken.
- Pull the cooked meat of the chicken and serve it for dinner.
- Store any leftover meat in the fridge to use later on to make chicken and noodle or chicken and rice soup with the bone broth you’re about to make.
- Put everything that’s left – all the bones and any remaining bits and pieces of meat – into a large pot that has a lid.
- Fill it with plenty of cold water. The more water you add, the more broth you’ll get in the end. Don’t fill it all the way to the top or you risk the liquid bubbling over.
- Next, add a good splash of apple cider vinegar to the pot. If you don’t have the vinegar in your pantry don’t fret it. You can add a splash of red wine or white vinegar if you’d like.
Note: The vinegar helps get all the minerals out of the bones and into the broth (read more about that here). - Cover the pot with the lid and crank up the heat until everything comes to a full boil.
- Reduce the heat to a simmer.
- Cook your bone broth for a minimum of 12 hours. Although, if you can cook it for 48 to 72 hours, that is better.
- Pour some of the finished bone broth into a smaller pot, add the shredded chicken along with some rice or noodles and leftover veggies to make some soup. Or just drink the broth.
Different Ways Of Making Bone Broth
The method you use is a matter of preference. If you are going to be around, use the stovetop method.
If you work outside the home or want to keep the broth going overnight, a crockpot will be a better choice.
Pick what works for you and start making some of this delicious broth.
1. Stock Pot Bone Broth
This is the traditional way of making broth and stock. You can make a large batch of bone broth and use even the largest batch of bones or the Thanksgiving turkey carcass.
Here’s how to do it:
- Get out your stockpot and put the bones in there. It’s perfectly fine if they have some meat and cartilage on them. In fact that cartilage will dissolve and make the broth even better for you and your joints.
- Add plenty of water and a good splash of Apple Cider vinegar.
- Cover the pot and bring the mixture to a full boil. Reduce the heat to low and allow your broth to simmer for 12 to 72 hours.
- Start the broth in the morning on a day when you’ll be home and let it simmer all day. Turn the stove off right before you go to bed.
- The next morning, crank up the heat and bring the broth back to a boil, then simmer all day again.
- Rinse and repeat for as long as you see fit. After a good 12 to 24 hours of simmering and sitting the broth will have most of the nutrients leached from the bones and taste great.
- The longer you boil it the better it gets.
- Strain the liquid and store it in the fridge for 3 to 4 Days.
2. Crock Pot Bone Broth
If you don’t want to “baby-sit” your broth all day or continue to simmer it for 24 to 72 hours straight, put your slow cooker to work.
This works particularly well for a chicken carcass or any small batch of bones.
- Put the bones in the crockpot and cover them with plenty of water.
- Again, adding a splash of apple cider vinegar will help get the most nutrients and minerals from the bones.
- Cover and cook on low as long as desired.
- Strain out the liquid and if you’d like, start another batch with the same bones.
You can get up to 3 batches of bone broth out of each batch of bones.
3. Perpetual Bone Broth
The basic idea is that you have a pot of broth simmering at all times.
You dip out what you need to drink or cook with, add more water and bones as needed and keep it going.
You can do this on the back of the stove, turning it off at night, but it may be safer and more efficient to make your perpetual broth in the slow cooker.
This is a good idea if you’re sick and are trying to get a constant supply of hot broth to sip on without a lot of work.
- Put your chicken bones in the slow cooker along with any herbs or seasonings you like, cover with water and cook for 12 hours.
- Then start dipping out a cup or two of broth at a time, refilling it with water each time.
- Use the broth for 3 to 6 days, then remove everything from the slow cooker, clean it and start over.
4. Instant Pot Bone Broth
Lisa from Farm House Boone demonstrates in this video how to make broth in an Instant Pot.
It’s much like making it in a crockpot but faster.
What Bones Can You Use To Make Bone Broth
You may be wondering what type of bones you can use to make a batch of broth.
Bone broth can be made from just about any type of bone, but for the best result, make sure you include some larger bones containing marrow and some knuckles and/or feet (chicken) to get plenty of collagen.
Let’s look at some of the different types of bones you can use and where to find them.
1. Chicken Bones
Here’s something easy.
Chicken bones are the perfect “gateway” bones to make your first batch of bone broth.
Go buy a nice organic chicken.
Roast it and enjoy the meat for dinner.
Toss everything else into a large stockpot, cover with water and simmer for at least 12 hours.
If you’re in a rush, you can even pick up a rotisserie chicken at the grocery store and use the bones when you’re done to make broth.
It’s a great way to make sure you’re using up every little bit of the bird and you and up with some tasty broth.
If you have a farmer in your area that raises chickens for meat or eggs, ask what they do with the bones.
You may just find a source of chicken bones free of charge.
You can make broth from raw bones, but the flavor will be better if you roast them in the oven first.
2. Turkey Bones
Turkey works just as well as chicken but you may just want a larger pot.
Before you toss that turkey carcass leftover from Thanksgiving or Christmas dinner, make a big batch of broth.
Bone broth freezes really well.
Make a big batch and run the broth through a strainer. Store it in containers and freeze until you’re ready to use it.
Bones can be boiled several times to make more batches of broth.
Make one batch to freeze and then another one to use right away. Use less water the second time around to still get a flavorful broth.
3. Beef and Pork Bones
Both beef and pork bones make for some amazing broth.
They are a little bit harder to find though.
Talk to the butcher at your local grocery store and ask him to save the bones for you. Sometimes you can even find inexpensive soup bones in the meat department.
Your local farmers market is another great place to source your bones.
Talk to the farmers. Even if they don’t raise beef or pork themselves, they can get you in touch with someone who does.
Roast your bones before you make the broth for the best results. Just spread them out on a baking dish and bake at 450 F for 20 to 25 minutes.
Allow them to cool until they are comfortable and safe to handle.
Put the bones in a large stockpot, add plenty of water and boil for at least 12 hours. Use a combination of marrow bones and knuckle bones to get the best broth with the most health benefits.
4. Bison and Wild Game Bones
If you’re lucky enough to have a hunter in the family, ask him to save the bones for you or call up your local game processing business and ask about buying bones from deer.
You treat them just like pork or beef bones.
The same goes for bison bones.
If you have a bison farm in the area, it is worth making a call.
While you’re there, pick up some ground bison too for some of the tastiest burgers you’ve ever had.
How To Use Bone Broth In Cooking
Aside from drinking fresh bone broth by the cup, you can use it anywhere you would use chicken broth or vegetable stock.
1.The obvious first choice is of course as a base for soups and stews.
The bone broth will add a lot of extra flavor and nutrition to all your favorite soups.
Instead of adding water, or water along with a couple of bouillon cubes, use your bone broth.
The broth gives all your soups and stews that yummy homemade flavor.
Even something you throw together quickly will taste like you’ve cooked it for hours on the back of the stove.
But don’t just stop there.
2. Try boiling your rice in beef broth instead of plain water for a tasty side dish.
Not only will it taste much better, but you’re also adding a lot of extra nutrition.
You can do the same with pasta.
3. Boil your noodles in the broth, then serve the broth in bowls before the meal.
4. If you’re making mashed potatoes, add a couple of splashes of broth to thin them out as needed.
Much tastier than using water and better for you than adding more milk.
Go all out and make a batch of potato soup instead of mashed potatoes.
5. If you’re cooking a big pot of dry beans, replace some of the water with bone broth.
You’ll get a lot of great flavor without having to add a ham bone or bacon.
Give it a try the next time you put on a pot of pinto beans.
Related: Science Behind Collagen Supplements
Storing and Freezing Bone Broth
Making big batches is a lot easier and more efficient. Now let’s find out how to store everything you can’t use up right away.
1. Storing Bone Broth In The Fridge
Allow your bone broth to cool completely after you’ve finished boiling it.
Anything you haven’t used up by this point should be strained into clean jars and stored in the fridge for up to a week.
You can use the broth straight from the fridge in your favorite soups or stews.
If you want a cup to drink, pour some in a small pot and warm it over the stove.
Add a few herbs and spices to taste.
This will come in particularly handy after the broth has set for a few days and doesn’t taste quite as good as the first day.
2. Freezing Bone Broth For Long Term Storage
If you have more broth than you can use over the course of a few days, it’s probably a good idea to go ahead and freeze the majority of it.
Once your pot of broth and bones has cooled enough to be safe to handle, strain the liquid into a large bowl or pitcher.
Depending on how you plan to use the broth later on, you can either freeze it in glass jars or plastic containers or pour it into ice cube trays for smaller portions of broths that you can add to veggies as you cook them, think out mashed potatoes, etc.
Freezer Containers
- Get your freezer containers ready and stir up your broth to make sure all the nutrients are equally distributed.
- Pour the broth in the freezer containers and allow them to stay on the counter until they have cooled down to room temperature.
- Label your containers with the contents and today’s date and move them to the freezer.
Use Ice Cube Trays
- Pour broth into trays
- Set them in the freezer for a few hours or until the broth is frozen solid, then pop them out and transfer them to a freezer bag.
- Label the bag and put it back in the freezer.
- Grab individual bone broth cubes as you need them.

Adding Variety to Your Bone Broth With Veggies and Spices
Once you’ve made a few batches of plain bone broth it’s time to spice things up and add a little variety.
The beauty of making your own homemade broth is that you can add just about anything to it.
There are two ways to do this.
- You can add some veggies, aromatics, and spices during the cooking process
- You can spice things up once the broth is finished.
Adding some spices and seasonings after the fact is a great way to change up the flavor of individual bowls of broth. It also helps your bone broth flavor after it has sat in the fridge for a few days.
Bone broth will always be its tastiest right after it’s cooked.
But it’s easy to doctor things up with a little garlic salt, some pepper, and anything else you like in your spice cabinet.
Keeping things basic when you make a big batch of broth makes it easy to use the broth later.
You can boil your rice in it, add it to your favorite stew or drop a little in your green smoothie. With the relatively neutral flavor of pure bone broth, you will get good results no matter what you make.
And as mentioned before you can season it to your liking after the broth is done.
Here are a couple of herbs, spices, and the likes you may want to add to your broth:
- Salt and Pepper
- Garlic Salt
- Onion Powder
- Green Onion
- Fresh or Dried Herbs :
- Parsley
- Basil
- Oregano
- Rosemary
- Sage
- Chive
- Thyme
- Spices:
- Cayenne
- Turmeric
- Curry
- Cumin
- Soy Sauce
- Hot Sauce
Of course, this isn’t an all-inclusive list. If it sounds tasty, try adding it to your broth for added flavor.
The other option is, of course, to add herbs, spices, veggies, and aromatics to add during the cooking process.
When you start your bone broth, look through the fridge for veggie scraps. Onions, carrots, celery, garlic, and leek are all great options.
Add them to the broth as it starts to boil.
Even peels and scraps will work since you’ll be straining the broth.
Just make sure they are clean before you toss them in the pot.
Dried herbs and spices can also be added in the beginning. When it comes to fresh herbs though, I wait until the end of the cooking process.
Most fresh herbs are fairly delicate and you’ll lose all the good flavor and any nutritional benefits if you boil them for 12 hours or longer.
Just hold off and throw them in for the last few minutes before cooling and straining your broth.
What Do You Think?
Will you make your own bone broth?
I used to make it all the time but now only on occasion.
Admittedly, I buy organic bone broth and collagen supplements more often than not.
My current favorite collagen supplement is the Marine Collagen by Isagenix.
Although not the same as making your own it can work when you are busy, tired, or just want a shortcut.
Sources:
https://www.unmc.edu/publicrelations/media/press-kits/chicken-soup/research.html
https://www.ncbi.nlm.nih.gov/pubmed/18416885
https://draxe.com/nutrition/glucosamine/